
Amy and Emily Chung, AKA the Rangoon Sisters, are wondering how they can mark the launch of their debut cookbook. Having spent more than a year (including some of Emily’s maternity leave) writing it, they were planning a big party to celebrate. “It’s a really exciting time for us, so we were really looking forward to getting all our loved ones together,” says Emily. That still seems unlikely. They’ve toyed with the idea of video cook-alongs, or preparing a supper-club-style feast to send out for virtual guests to finish at home. “If I didn’t have my day job then I could just go round and deliver it to everyone,” says Emily. Both sisters are NHS doctors and have worked throughout the coronavirus crisis, Emily adding video consultations in her area of sexual health, while Amy, a psychiatrist, has continued to see people face to face.
The sisters started a supper club in 2013 and quickly became one of the standout names of the scene; thanks in part to curious eaters’ interest, but mainly due to their warmth and generosity as hosts, and thoughtfully cooked menus. Guests came to try the Burmese food of the Chungs’ Anglo-Chinese-Burmese home – sharing dishes including gently spiced curries, fresh vegetables with a shrimp dip, lots of rice and lots of salads. “Burmese salads are really interesting,” says Emily. “A mixture not just of flavours but of textures; something crunchy, something soft, a bit of sour, sweet, salty…” Condiments such as balachaung, an addictive and spicy dry relish with tiny fried shrimp, shallots and garlic, add another layer of flavour to each mouthful.
Their book has chapters featuring all of these, as well as one on the Burmese tradition of excellent snacks and fritters, and a less traditional chapter of desserts including cheesecake and meringues. “We both have a massive sweet tooth, so the desserts are more of a homage to Burmese flavours, because they’re not into quite the same desserts that we are,” says Emily.
There are also two versions of perhaps the most famous Burmese dish, mohinga. “We’ve been brought up on Grandma’s or Mum’s mohinga,” Amy says, “but generally it is a fish noodle soup, and there are some differences throughout the country.” The book has an everyday version and a more involved one, although both – like all the recipes – are easily achievable for the home cook. “These are recipes we’ve been brought up cooking in our home, so we hope people should be able to do the same in their own homes,” says Amy.
“You have to be comfortable with onions,” adds Emily, with a laugh, referencing the two pages in the curries and stews chapter which detail their love for the allium. (“An extra onion never did a dish any harm.”) Details like this – as well as their dad’s superstitions – make this cookbook not only a valuable kitchen resource, but a great read.
For a family that meets up over food, lockdown has been hard. “Supper clubs bring everyone together – the husbands get involved, Mum gets involved,” says Amy. When lockdown was relaxed, the sisters had a garden visit, but it was cut short by rain, so they’re dreaming of the first family catch-up over dim sum (“Fighting over the last dumpling!”).
“At least everyone will have had this time to think about what’s important, so when we see each other it will be more meaningful,” says Emily. “We’ve taken a lot of things for granted in the past and I’ll be able to appreciate them better.”
Mohinga and pe kyaw – aromatic fish noodle soup and chana dal crackers
This is probably Burma’s national dish, and our version was the Guardian restaurant critic Grace Dent’s “Best thing I ate in 2017”. This fish noodle soup is traditionally eaten at breakfast, but is readily available as a snack at any time of day on the streets of Burma. The best we’ve had was cheap as chips, for as little as 30p a bowl, and eaten as we sat on plastic stools at the side of the road. Typically it is made with a type of catfish we can’t source easily in London, but Grandma has used pilchards as a substitute for years and it works brilliantly to replicate the flavour. Mohinga also usually contains sliced banana stem, but we tend to just add more whole shallots instead.
Serves 4-6
For the mohinga
rice flour 2 tbsp
garlic 6 cloves, peeled
ginger thumb-sized piece, peeled
lemongrass stalks 3
vegetable, sunflower or peanut oil 6 tbsp
onions 3 medium, thinly sliced
paprika 1 tbsp
turmeric powder 2 tsp
chilli powder 1–2 tsp
shrimp paste 1 tsp (optional)
fish sauce 2–3 tbsp, plus extra to season
pilchards in brine 1 x 400g tin (if you can’t find pilchards use tinned sardines)
shallots 300g, peeled, left whole
black pepper
To serve
dried rice vermicelli 400g (0.8–1mm size), cooked, rinsed and left in cold water
limes 3, cut into wedges
garlic oil (see below)
chilli flakes or chilli flakes in oil
hard-boiled eggs 6, cut in half
coriander leaves
crispy chana dal crackers 1 batch, broken up (see below)
For the crackers (makes about 10)
chana dal (or yellow split peas) 250g, soaked overnight or for at least 4 hours
rice flour 75g
plain flour 40g
glutinous rice flour 20g (optional, replace with 20g of rice flour if not using)
baking powder ½ tsp
salt ½ tsp, plus extra to serve
cold water 250ml
vegetable, sunflower or peanut oil for deep-frying
For the garlic oil
garlic 3 bulbs, peeled
vegetable, sunflower or peanut oil 400ml
turmeric powder 1 tsp
To make the chana dal crackers, drain the soaked chana dal in a colander, rinse with cold water and drain again. Empty the dal into a large bowl, along with the flours, baking powder, salt and the cold water and mix well – the batter should have the consistency of whole milk.
Pour the oil into a non-stick frying pan to about 3cm deep and set over a low-medium heat.
Test the readiness of the oil by placing a piece of dal in it; if it gently sizzles without rising to the surface, the oil is ready (if you have a thermometer, it should reach 130–140C). Turn off the heat.
Stir the batter well with a ladle before scooping up a portion and very gently and slowly pouring it into the pan, keeping the ladle close to the oil’s surface. The batter should sink to the base of the pan, making a flat, roundish cracker. You can use the back of the ladle to flatten the dal if it has become a “mound”. If the pan is big enough, repeat ladling 2–3 crackers in the same way. Set a timer for a minute, then turn the heat back up to high.
Leave the crackers to sizzle gently. They will appear floppy if you prod them, but do not worry – they should slowly rise to the surface and start to turn golden after 5 minutes (encourage them to lift off the bottom of the pan with a fish slice, if needed). Turn them over to cook for another 4–5 minutes. Once nicely golden and crisp, remove carefully and shake off any excess oil. Place on a plate lined with kitchen paper.
Turn off the heat and wait for the oil to cool – this will take about 3 minutes. Repeat the process, making sure you stir the dal batter well before each scoop, turning the heat off for a minute, then turning it back on to high, and so on.
Lightly season the crackers with sea salt and serve.
To make the garlic oil, separate the garlic cloves and slice them as thinly and evenly as you can. Make yourself comfortable, maybe sit yourself in front of some mindless television, as it will take time. It can also make your fingers feel a bit burny, so you might want to put on disposable gloves for this. Line a plate with a few sheets of kitchen paper.
Heat the oil in a deep, medium saucepan or wok set over a medium-high heat. Do not leave the pan unattended. Have a heatproof strainer or sieve ready for fishing out the garlic pieces. Test the readiness of the oil by placing a piece of garlic in it; if it sizzles and comes to the surface within a few seconds, the oil is ready and you can add all the garlic at once, turning the heat down to low.
Keep a close eye on the garlic, turning the pieces regularly in the oil, being careful not to splash hot oil on yourself. Turn the heat down if the garlic is colouring quickly – we sometimes remove the pan from the heat completely for a minute or so if it’s doing this. Once the garlic pieces are golden brown and crisp, take the pan off the heat.
Scoop out the crispy garlic pieces using a heatproof strainer or sieve and transfer them to the plate with the kitchen paper, to stop them cooking further. It doesn’t matter if a few pieces remain in the oil. Stir the turmeric into the oil and leave to cool, then pour it into a clean, airtight bottle. You can then return the reserved crispy garlic pieces to the oil (they will remain crispy) or keep them separate to garnish other dishes.
The oil can be stored in the airtight bottle in a cool, dark place for up to 1 month, though in our house there’s rarely any left by that point. If you are keeping the crispy garlic pieces separate, they can be stored in an airtight container in a cool place for 2–3 weeks.
To make the mohinga, first prepare the rice flour. Toast it in a dry frying pan over a medium heat for 3–5 minutes, stirring occasionally. Tip the flour out onto a plate and set aside.
Crush the garlic and ginger to a paste in a pestle and mortar or food processor. Cut off and discard the first 5cm of the thin end of the lemongrass stalks and remove the tough outer layer, then bash what remains with a pestle or rolling pin to release the flavours.
Heat the oil in a large casserole dish over a medium heat. Add the sliced onions and cook until soft, stirring occasionally, for 5 minutes. Add the crushed garlic and ginger mix and stir for 1 minute, then add the lemongrass stalks.
Add the spices, shrimp paste, if using, and fish sauce and stir well. Then add the contents of the pilchards tin, including the brine. Mash the fish, then add the toasted rice flour and mix well to prevent it sticking to the bottom of the pan. Top up with 1.2 litres of water and add the whole peeled shallots. Bring to the boil and simmer gently for 1 hour, uncovered, stirring occasionally.
Once cooked, remove the lemongrass, add a good grinding of black pepper and adjust the seasoning with a little fish sauce.
Put some drained rice noodles into each individual serving bowl, ladle over the soup, add a squeeze of lime, a drizzle of garlic oil, some chilli, as desired, and top with boiled eggs, coriander leaves and your broken up crackers. Serve immediately.
The fish soup can be made in advance and stored in the fridge for up to 4 days. It can also be frozen for up to 3 months.
Kyet thar thoke – spiced chicken salad
Here we cook the chicken fresh for this salad, but you could always make it using leftover roast chicken. We would recommend keeping the skin on the thighs when roasting them, because it keeps the flesh moist and adds a wonderful crispy texture to the salad.
Serves 4 as a main
gram (chickpea) flour 4 tsp, toasted
chicken thighs 4, skin on
turmeric powder ½ tsp
paprika ½ tsp
chilli powder ½ tsp
salt a pinch
white cabbage ½ medium-sized (about 450g), finely sliced
limes juice of 3
garlic oil 5 tbsp (see mohinga recipe)
fish sauce 5 tsp
chilli flakes 1 tsp
shallots 4, finely sliced
To serve
coriander leaves
chilli flakes
crispy fried shallots (available online)
Preheat the oven to 180C fan/gas mark 6.
Sift the gram flour into a bowl, as it is usually quite lumpy. Heat a clean dry frying pan over a low-medium heat and add the flour. Stir around so it is distributed evenly and continue to stir intermittently, to ensure even toasting. It will begin to smell slightly nutty and will brown slightly after about 5 minutes. It may clump a little, which is normal; you can always re-sift it if it is particularly clumpy.
Coat the chicken thighs with the spices and the salt, and place on a baking tray in the oven. Roast for 35 minutes (check they are cooked by piercing them – the juices should run clear), then set aside to cool. Roughly shred the chicken with a fork and knife and place in a large bowl.
Add the rest of the ingredients, except for the garnishes, and mix well.
When ready to serve, divide the salad among four plates, then garnish each with the coriander, a sprinkle of chilli flakes and a teaspoon of fried shallots. Serve immediately.
Khayan jin thee thoke – tomato and crunchy peanut salad
This salad contrasts crunchy peanuts with vibrant fresh tomatoes. Use the best quality tomatoes you can buy to get the most out of this dish. It is best made fresh on the day, and can be served as a side with one of our curries or just simply with some rice.
Serves 4 as a side
gram (chickpea) flour 1 tsp, toasted (see chicken salad recipe)
unsalted roasted peanuts 50g
tomatoes 300g, at room temperature, quartered
green finger chilli ½, deseeded (optional) and finely sliced
dried shrimps 1 tbsp (optional)
shallots 1–2, peeled and thinly sliced
garlic oil 3–5 tbsp (see mohinga recipe)
lime juice of ½
fish sauce 2 tsp (omit to make vegetarian, then season with salt)
coriander leaves a small handful
crispy fried shallots to garnish (available online)
Crush the peanuts using a pestle and mortar or pulse a few times in a food processor (to the size of the nubs you get in a crunchy peanut butter).
Place the tomatoes, chilli, crushed peanuts and remaining ingredients in a large bowl and mix. Ideally, do this with clean hands to fully combine all the ingredients. Taste and adjust the seasoning, adding more fish sauce or chilli if necessary.
Transfer to a serving dish and garnish with the crispy shallots.
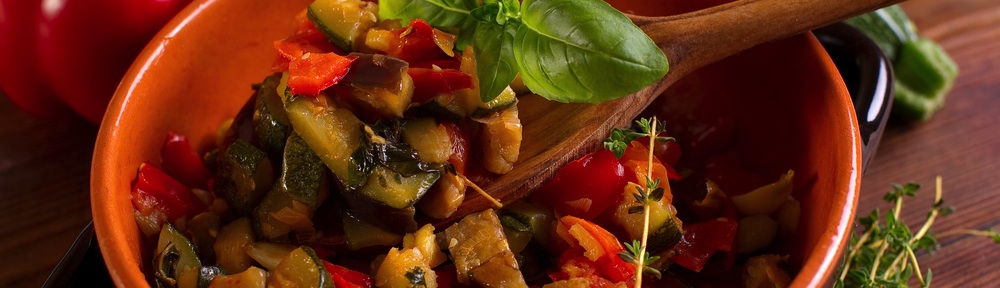
Khayan thee hnat – stuffed aubergine curry
In this dish we have tender baby aubergines stuffed with a strongly flavoured, shrimp-infused, spicy stuffing. You can use normal-sized aubergines if you can’t get hold of the baby ones – they just need to be cooked for a bit longer. Unfortunately this dish isn’t quite the same without the shrimp elements; it would still taste great but it would lack the umami kick.
Serves 4
dried shrimps 2 tbsp
vegetable, sunflower or peanut oil 5 tbsp
onions 2 medium, finely chopped
garlic 5 cloves, finely chopped
chilli flakes 1 tsp
turmeric powder 1 tsp
paprika 1 tsp
shrimp paste 1 tsp
long baby aubergines 8 (about 500g)
To serve
crispy fried shallots a handful (available online)
coriander leaves a handful (optional)
Pound the dried shrimps to a powder using a pestle and mortar, or use a food processor.
Heat 4 tablespoons of the oil in a large lidded frying pan over a low-medium heat and cook the onion and garlic for about 10 minutes until soft and golden coloured.
Add the chilli flakes, turmeric and paprika to the pan and stir for a minute or two, until fragrant. Stir in the shrimp paste, so it melts into the mixture, add the shrimp powder and mix well, then empty the contents of the pan into a separate bowl.
Cut the aubergines in half along their length, but not all the way through, keeping the stem intact. Then make another cut along the length, again preserving the stem, so the aubergine is in quarters but still connected by the stem. Carefully “fill” each aubergine with the mixture with your hands. This may get a bit messy and some of the filling may fall out, but that is fine. You should be left with a small amount of filling to add to the cooking sauce.
Give the used frying pan a bit of a wipe with kitchen paper, then heat the remaining oil in it over a high heat. Carefully add the aubergines. Try to turn them over carefully so that all sides are charred. This should take a couple of minutes. Add 150ml of water to the pan with the remaining filling and bring to the boil. Leave to simmer with a lid on.
After 15 minutes the aubergines should be soft and ready to serve. Garnish with the fried shallots and coriander.
Thayet thee ohn thee mont – mango, lime and coconut meringues
This is an absolutely winning combination of flavours that we have served up at several supper clubs over the years. It’s perfect for entertaining because the meringues and lime curd can be made the night before, so the dessert only needs a quick assemble just before serving. Our meringue-making method is the Delia Smith one – reliable every time.
Makes 8
For the meringues
egg whites 3
caster sugar 170g
For the lime curd
limes zest and juice of 2
egg yolks 3
unsalted butter 25g
caster sugar 50g
To assemble
unsweetened desiccated coconut 50g
double cream 300ml
mango 200g, stoned, peeled and diced into 1cm pieces
Preheat the oven to 130C fan/gas mark 2.
In a clean, dry mixing bowl, whip the egg whites with an electric whisk. Start on a low speed and gradually increase the speed over the next 2–3 minutes to the highest setting until the egg whites are stiff peaks, then stop. Add half the sugar to the egg whites and whisk at high speed, then add the remaining sugar until the meringue is glossy and firm – this usually takes 2 minutes.
Line two baking sheets with greaseproof paper. Spoon 4 mounds of meringue on to each sheet, spaced out evenly. Using the back of a spoon, make a shallow dip in the centre of each meringue, where the topping will sit once they’re cooked. Place the trays in the oven for 35 minutes; once that time is up, switch off the oven and leave the meringues to cool and dry in there overnight.
While the meringues are cooking, prepare the lime curd. Make a bain-marie with a heatproof bowl set over some simmering water (make sure the bowl does not touch the water, though) and add all the ingredients for the curd to the bowl. Stir to dissolve the sugar and melt the butter. Making the curd requires a bit of patience, as it will take anywhere between 6 and 8 minutes to thicken: it should coat the back of a wooden spoon when it is done. We then strain it through a sieve, to get rid of the zest, and let it cool before refrigerating overnight in a covered container.
For the assembly, toast the desiccated coconut in a dry frying pan on the hob, stirring throughout – watch it carefully and don’t let it turn brown, it will only take a minute. Whip the double cream until it’s thick.
Plate up the meringues, then top each one with a spoonful of cream, a dollop of lime curd, some mango pieces and finally a sprinkling of toasted coconut. Serve immediately.
The meringues can be stored in an airtight container for up to a week. The lime curd can be stored in a sterilised container in the fridge for 1–2 weeks.
The Rangoon Sisters: Recipes From Our Burmese Family Kitchen (Ebury, £20) is published on 30 July
